Making a Christmas Stocking
Page 2
Keep your stocking selected and add a new layer.
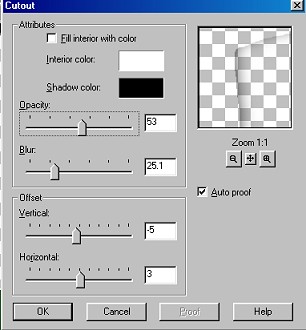
Go to Image...Effects...Cutout and use these settings
Now de-select it.
Merge Visible Layers
Now set your foreground color to black.
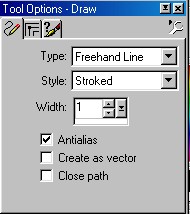
Choose your Draw tool...look in the corner of the image below
to see what it looks like. Use the settings below.
Draw your stitches in the toe and heel by making short lines.
Don't make them even..unless you are a perfect stitcher *S*
I think they look better kinda crooked though.
Like this.
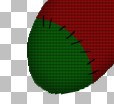
Don't forget to do the heel too.
Now add a new layer.
Go to Selections....Load from Disk
and choose jstockingtop.sel
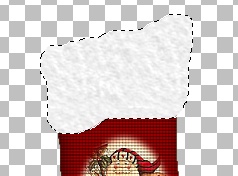
Set your Foreground color to white
Flood fill the selection.
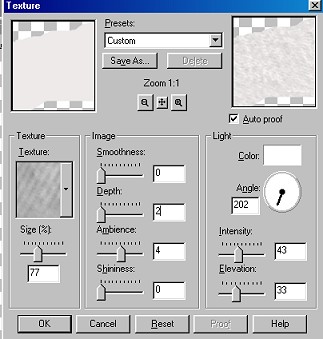
Keep it selected...go to Image...Effects...Texture
and use these settings. The texture is #15 in the drop down box.
And the depth is 2...I forgot to move my curser so ya could see it
good
and I'm too lazy to do another screen shot. *S*
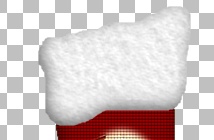
Keep it selected...add a new layer and go to Image...
Effects...Cutout...use the same settings as before.
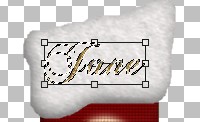
Now if you want to add your name to it...
Add a new layer...
Use the text tool to write your name in whatever font you want.
After you set your text..you can add a Blade Pro preset if you want..
If you want your text angled..
Keep it selected and click on the Deformation tool.
Now see the box it puts around your text ? Look inside the box and
you will see
two small boxes. The one on the right ..if you run your curser over
it will
show you two little arrows going in a circle. When you see the arrows.
click and hold and turn it toward the top to make your text angled.
You can watch your text to see about how much to turn it.
When you get it angled like you want..double click inside the box ..
then click yes to apply deformation. Keep it selected and go to Image..Sharpen
and sharpen once.
If you want..you can add a slight drop shadow to it .
You can also add holly leaves or pinecones or whatever to it to decorate
it up a bit more. Be sure and Merge Visible Layers when your done .
I also added some more shadow to mine by using the Retouch tool set
to
Darken RGB...size 25..Density 80...Opacity 70..
Then I ran it quickly around where my stitches are on the toe and heel.
I just ran it along the color change line there.