|
|
|
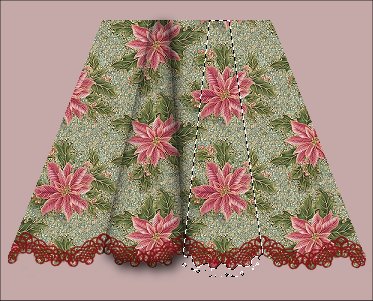
Now again..use the Lasso selection tool and select
the next pie shaped area...like this
Notice where it meets the other one in the V at the bottom.
Also make sure you are on the layer named Merged to make
the
lasso selection on each one of these.
Follow the exact same steps as the last one.
Do this for all of them except the very end ones.
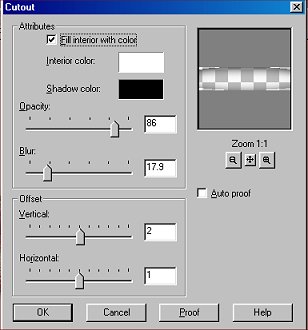
On the end ones..change the blur in the cutout to about 9.8
You can play with the blur and the opacity on each one to get different
looks if you want. Also..on the RIGHT end one..DO NOT add the drop
shadow,
It should look something like this.

Now go to your Layers Dropdown box and make Layer 1 invisible again.
Make sure you have any one of the other layers selected..then go to
Image..Merge Visible.
Now go back and make the Layer one visible again.
Now make sure you have the Merged layer selected and add a new layer.
On the new layer...use the Preset shapes tool set to ellipse...filled...antialias
checked.
And draw an ellipse at the top of your table like this

Click on the Deformation tool and use the boxes at the sides to pull
it in and
adjust it to fit the top of your table.
Now use the rectangel selection tool...antialias checked..
draw a box all around the black .and select it by clicking
on the black somewhere. Flood fill it with your pattern.
Hit Ctrl C to copy it.
Keep it selected..go to Images..Inner Bevel and use these settings

Now de-select it.
Hit Ctrl E to paste the copy you made back on it and place it so that
it
lets the bevel edge show ...just barely. I do this so that the back
edge will
be smooth and not shadowed by the beveling.. This gives it a front
edge.

Keep it selected...add a new layer...go to Image..Cutout..use these
settings
De-select it.
Now once again go to the Layers Dropdown box and
make Layer 1 invisible. Then go to Layers...Merge Visible.
Now make Layer 1 visible again.